Category: RE:Creation

  • RE:Creation No. 3: Dorset Cereals | Front panel | HTML (markup)

    Previously, we have tackled the Text stage of RE:Creation wherein we came up with a textual content of the front panel of the packaging which is our basis for this stage.

    Summary

    RE:Creation: HTML
    A diagram showing the RE:Creation steps in HTML stage.
    1. Mark up the structure in HTML
    2. Mark up the groups in HTML
    3. Mark up the individual elements in HTML

    Markup

    Marking up means identifying elements, defining, and labeling them. It is just like in Text stage when we labeled elements and grouped them — but this time, we take it a step further by using HTML tags which has the capability to define where a markup starts and where it ends.

    In HTML, we’ll use start and end tags to enclose elements. Once elements are enclosed by these tags, web browsers will be able to interpret and display them accordingly.

    Syntax

    Speaking of HTML tags, they have a syntax for us to follow. Syntax is the arrangement of symbols and rules that constitute the correct form of a language just like HTML. As an example for the label “Header”, the HTML tag will be <header> and </header>; for “Main”, <main> and </main>; and for “Footer”, <footer> and </footer>.

    Readability

    It is one thing to make our content readable for web browsers (for them to properly interpret and display it) and another thing to make it readable for humans (us and other coders who will be reading or modifying our works).

    The fact that we have marked up our content in HTML tags, that makes it readable for web browsers. Indentation, on the other hand, makes it readable for human readers. All content within structures can be indented; the same as content within groups. In this way, we could see how the content is nested by looking at it.

    Step 1: Mark up the structure in HTML

    • Enclose the structure labels in “less than” (<) and “greater than” (>) signs
    • For their delimiters or boundaries, simply add a “slash” after the “less than” (<) sign
    • Convert the labels to the “small caps” (e.g., “Header” becomes “header”)
    • Indent the nested elements within the structure

    See the Pen RE:Creation No. 3: Dorset Cereals | Front panel | HTML – Mark up the structure in HTML by Brian Dys Sahagun (@briandys) on CodePen.

    At this point in our activity, we can already view the result of our markup in a web browser. In our demo in CodePen, you can see on one side what the browser will display given our markup. It’s not apparent because the text elements are still placed side by side, but the result already shows the structure we made: the “Header”, starting with “Product name”, the “Main”, starting with “Product main description”, and “Footer”, starting with “(none)”.

    Step 2: Mark up the groups in HTML

    • Similarly with step 1, mark up the groups by converting their labels into HTML start and end tags
    • For the syntax, aside from making everything in “small caps”, convert spaces to underscores (“_”)
    • Again, indent the nested elements within groups for readability

    See the Pen RE:Creation No. 3: Dorset Cereals | Front panel | HTML – Mark up the groups in HTML by Brian Dys Sahagun (@briandys) on CodePen.

    Step 3: Mark up the individual elements in HTML

    Individual elements are the actual textual content inside the structure and groups. We could combine steps 2 and 3 once we’re used to marking up content in HTML.

    • Similarly with step 2, mark up the individual elements by converting their labels into HTML start and end tags
    • As an added effort for readability, we could remove empty lines between groups and their nested content, to make them visually grouped together

    See the Pen RE:Creation No. 3: Dorset Cereals | Front panel | HTML – Mark up the individual elements in HTML by Brian Dys Sahagun (@briandys) on CodePen.


    The result of our markup may not visually show much improvement but we’re already paving the path for a solid basis of HTML and CSS.

    For our next activity, we will be going into the details of HTML tags. Since HTML is a language, it has a vocabulary — meaning, it already has a set of tags that is equivalent to what we created at this stage.

  • RE:Creation No. 3: Dorset Cereals | Front panel | Text

    Previously, we have tackled an introduction to recreating Dorset Cereals. Now, we’ll begin with doing the initial work that will be the basis of the HTML and CSS.

    Summary

    RE:Creation: Text
    A diagram showing the RE:Creation steps in Text stage.
    1. Convert content into text
    2. Group and label texts
    3. Structure groups via header, main, footer
    Dorset Cereals - Front panel elements
    The front panel of Dorset Cereals with element labels.

    The first step of RE:Creation is to convert the content (in this case, the visual elements) into text. As you can see in the figure above, we have itemized the elements of the front panel and we have also grouped related elements together. This kind of visualization makes it easier for us to accomplish this stage.

    Step 1: Convert content into text

    • Let’s go from left to right, top to bottom in converting content into text
    • For symbols, if they have a corresponding Unicode character, let’s use them (e.g., use ℮ for estimated sign, ® registered sign)
    • For illustrations, we could describe the type of style they have

    See the Pen RE:Creation No. 3: Dorset Cereals | Front panel | Text – Convert content into text by Brian Dys Sahagun (@briandys) on CodePen.

    Step 2: Group and label the texts

    • There are elements that need to be grouped together and there are elements that are standalone
      • “Pioneer Centre” and “326.00” can be grouped into “Store tag”
      • “Dorset Cereals®” is standalone and can be labeled as “Product name”
    • Label everything, both elements and groups
    • Identify and label “main” elements based on the contents’ visual hierarchy (e.g., “Product main description” — “main” is depicted based on the elements position and size in the visuals)
    • Labels can describe the content’s literal meaning (e.g., “Product content percentage description” instead of simply, “Product description”)

    See the Pen RE:Creation No. 3: Dorset Cereals | Front panel | Text – Group and label texts by Brian Dys Sahagun (@briandys) on CodePen.

    Step 3: Structure groups via header, main, footer

    • “Header” group contains identifying information that help the consumer immediately identify the product
    • “Main” group contains the details that help the consumer decide to buy or not buy the product
    • “Footer” group contains other information that supplements the details when the consumer wants to learn more
    • Distribute the labeled groups into the header-main-footer structure
    • Arrange the groups according to the importance of its containing information (e.g., “Main illustration” is placed last because other information are more important in terms of helping the consumer decide)
    • At this point, there is no information that fits in the “Footer” group

    See the Pen RE:Creation No. 3: Dorset Cereals | Front panel | Text – Structure groups via header, main, footer by Brian Dys Sahagun (@briandys) on CodePen.

    You might have noticed that we’ve replicated the capitalization of text to simplify the process. For example, the store name could be styled as “Pioneer Centre” but we opted to replicate it as “PIONEER CENTRE”. Capitalization has a nuance in the brand’s style of writing. In any case, CSS can handle modifying the capitalization, and we’ll get to that later in the process.

    That’s it for Text stage!

    Now, we already have a basis for coding in HTML and CSS. Go to the next stage, which is HTML (markup).

  • RE:Creation No. 3: Dorset Cereals

    Dorset Cereals
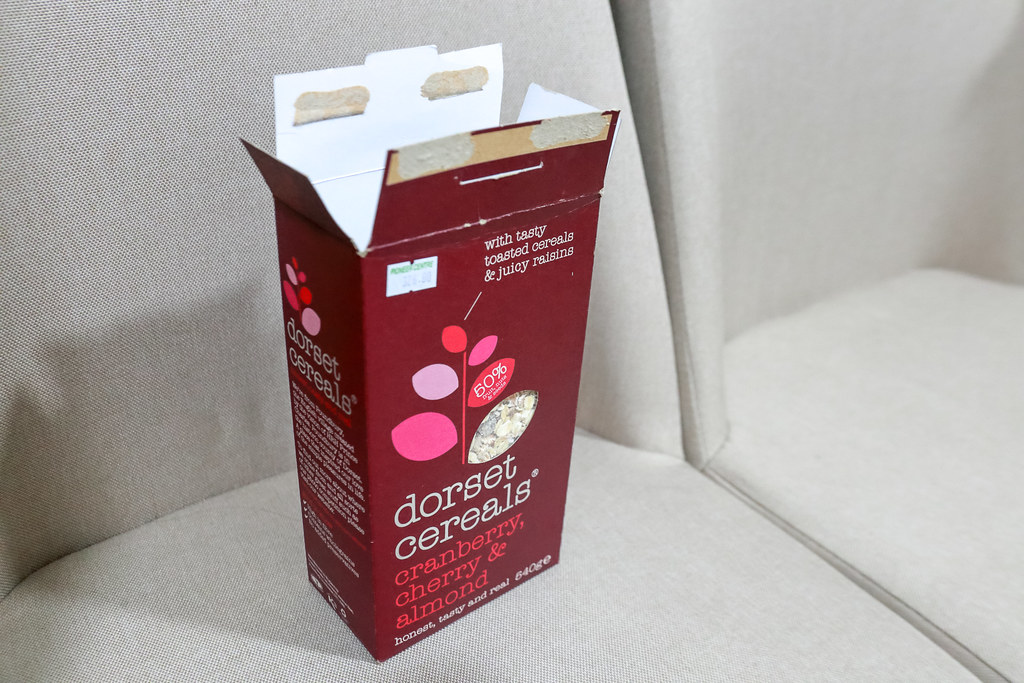
    An open Dorset Cereals box in a chair.

    In this episode of RE:Creation, we’ll be recreating a cereal box in HTML and CSS. One thing I like about consumer product packaging is that almost everything is written there in that little space. It’s like a website in the palm of your hands at a grocery aisle (or at your breakfast table).

    First, let’s lay down all the steps that we will take in order to make this happen.

    RE:Creation steps
    A diagram showing the steps of RE:Creation.
    1. Planning
      • What is the goal?
      • How to approach this thing?
      • What are the elements involved?
    2. Doing
      • Converting to Text
      • Converting to HTML
      • Converting to CSS
    3. Wrapping up
      • Did we achieve the goal?
      • What did we learn?

    Planning

    In order for us to have a clear scope of this exercise, we need to see the all the elements of the packaging through an expanded view.

    Dorset Cereals - Expanded View
    Dorset Cereals packaging in an expanded view.

    Goal

    The main goal is for us to recreate it using HTML and CSS and learn various concepts of design and coding along the way.

    Approach

    First, look at the information and identify which are important compared to others — that will be the arrangement of contents in HTML. For example, the front of the packaging comes first before the sides and back.

    Next, look at how the panels are laid out — that will be the visual arrangement in CSS. For example, the back of the packaging is at the leftmost — which means, it comes first before the sides and front (for left to right direction).

    Elements

    We’re breaking down the packaging to its individual elements by panel and flap. We have 4 panels and 9 flaps, for a total of 13 segments — this is also how we are scoping each section of the recreation. For example, we will tackle the front panel first, then back panel, and so on.

    Dorset Cereals - Segment Labels
    Dorset Cereals packaging with segment labels.

    Let’s begin converting the front panel to Text.

  • Nutrition Facts Label: CSS – Round 2

    Summary

    • Style for Colors
    • Style for Graphics
    • Style for Typography

    Demo

    See the Pen RE:Creation No. 2: Nutrition Facts Label | CSS (Round 2) by Brian Dys Sahagun (@briandys) on CodePen.

    [ntt_percept post=”nutrition-facts-label” “ntt_rec_nav”]

  • Nutrition Facts Label: CSS – Round 1

    Summary

    • Style for the Layout

    Demo

    See the Pen RE:Creation No. 2: Nutrition Facts Label | CSS (Round 1) by Brian Dys Sahagun (@briandys) on CodePen.

    [ntt_percept post=”nutrition-facts-label” “ntt_rec_nav”]

  • Nutrition Facts Label: HTML – Round 2

    Summary

    • Convert the Tags into <div> and <span>
    • Classify the Elements by Adding class Attribute

    Demo

    See the Pen RE:Creation No. 2: Nutrition Facts Label | HTML (Round 2) by Brian Dys Sahagun (@briandys) on CodePen.

    [ntt_percept post=”nutrition-facts-label” “ntt_rec_nav”]

  • Nutrition Facts Label: HTML – Round 1

    Summary

    • Start with the Basic HTML Document Markup
    • Mark up the Structure, Groups, and Individuals in HTML

    Demo

    See the Pen RE:Creation No. 2: Nutrition Facts Label | HTML (Round 1) by Brian Dys Sahagun (@briandys) on CodePen.

    [ntt_percept post=”nutrition-facts-label” “ntt_rec_nav”]

  • Nutrition Facts Label: Text – Round 2

    Summary

    • Group and Label Content
    • Structure the Groups Using HMF

    Demo

    See the Pen RE:Creation No. 2: Nutrition Facts Label | Plain Text (Round 2) by Brian Dys Sahagun (@briandys) on CodePen.

    (more…)
  • Nutrition Facts Label

    Introduction

    In this second episode of RE:Creation, we’re going to re-create something that we’re all familiar with—the Nutrition Facts Label. This particular design is specific to U.S. Food and Drug Administration—although most nutrition information from other countries appear similar in terms of their tabular design.

    We may ask, isn’t this label a print material (as opposed to digital)? Yes, this label—and others like it—are plastered in every packaging of edible products across the planet. Why would we delve into converting it for web then?

    Nutrition Facts Label
    An example of a Nutrition Facts label.
    (more…)