Blog
-
RE:Creation No. 3: Dorset Cereals | Front panel | HTML (markup)
Previously, we have tackled the Text stage of RE:Creation wherein we came up with a textual content of the front panel of the packaging which is our basis for this stage.
Summary

A diagram showing the RE:Creation steps in HTML stage. - Mark up the structure in HTML
- Mark up the groups in HTML
- Mark up the individual elements in HTML
Markup
Marking up means identifying elements, defining, and labeling them. It is just like in Text stage when we labeled elements and grouped them — but this time, we take it a step further by using HTML tags which has the capability to define where a markup starts and where it ends.
In HTML, we’ll use start and end tags to enclose elements. Once elements are enclosed by these tags, web browsers will be able to interpret and display them accordingly.
Syntax
Speaking of HTML tags, they have a syntax for us to follow. Syntax is the arrangement of symbols and rules that constitute the correct form of a language just like HTML. As an example for the label “Header”, the HTML tag will be
<header>and</header>; for “Main”,<main>and</main>; and for “Footer”,<footer>and</footer>.Readability
It is one thing to make our content readable for web browsers (for them to properly interpret and display it) and another thing to make it readable for humans (us and other coders who will be reading or modifying our works).
The fact that we have marked up our content in HTML tags, that makes it readable for web browsers. Indentation, on the other hand, makes it readable for human readers. All content within structures can be indented; the same as content within groups. In this way, we could see how the content is nested by looking at it.
Step 1: Mark up the structure in HTML
- Enclose the structure labels in “less than” (<) and “greater than” (>) signs
- For their delimiters or boundaries, simply add a “slash” after the “less than” (<) sign
- Convert the labels to the “small caps” (e.g., “Header” becomes “header”)
- Indent the nested elements within the structure
See the Pen RE:Creation No. 3: Dorset Cereals | Front panel | HTML – Mark up the structure in HTML by Brian Dys Sahagun (@briandys) on CodePen.
At this point in our activity, we can already view the result of our markup in a web browser. In our demo in CodePen, you can see on one side what the browser will display given our markup. It’s not apparent because the text elements are still placed side by side, but the result already shows the structure we made: the “Header”, starting with “Product name”, the “Main”, starting with “Product main description”, and “Footer”, starting with “(none)”.
Step 2: Mark up the groups in HTML
- Similarly with step 1, mark up the groups by converting their labels into HTML start and end tags
- For the syntax, aside from making everything in “small caps”, convert spaces to underscores (“_”)
- Again, indent the nested elements within groups for readability
See the Pen RE:Creation No. 3: Dorset Cereals | Front panel | HTML – Mark up the groups in HTML by Brian Dys Sahagun (@briandys) on CodePen.
Step 3: Mark up the individual elements in HTML
Individual elements are the actual textual content inside the structure and groups. We could combine steps 2 and 3 once we’re used to marking up content in HTML.
- Similarly with step 2, mark up the individual elements by converting their labels into HTML start and end tags
- As an added effort for readability, we could remove empty lines between groups and their nested content, to make them visually grouped together
See the Pen RE:Creation No. 3: Dorset Cereals | Front panel | HTML – Mark up the individual elements in HTML by Brian Dys Sahagun (@briandys) on CodePen.
The result of our markup may not visually show much improvement but we’re already paving the path for a solid basis of HTML and CSS.
For our next activity, we will be going into the details of HTML tags. Since HTML is a language, it has a vocabulary — meaning, it already has a set of tags that is equivalent to what we created at this stage.
-
Moving portraits
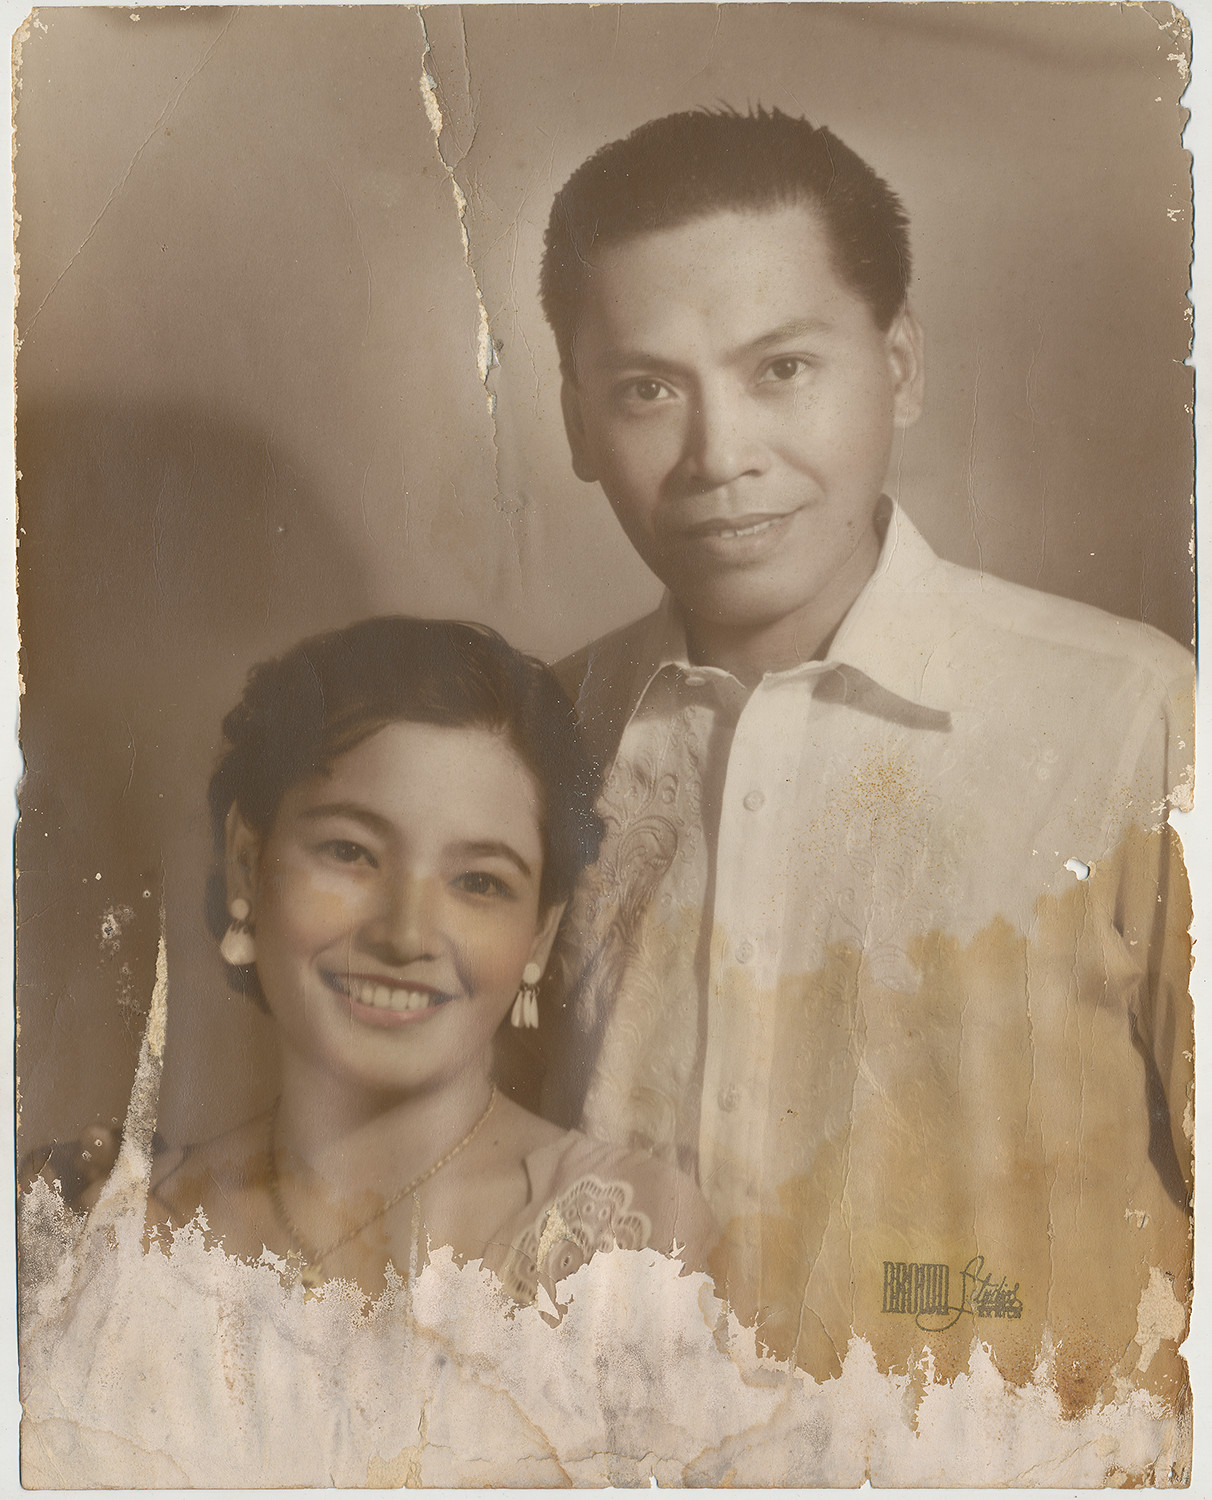
A wedding portrait of my paternal grandparents. I admit, I am amazed by technology when it can bring photos to life. Decades ago, I scanned my paternal grandparents’ wedding portrait with the purpose of restoring it. It was scanned in four parts and the best restoration that I could do was stitch them together and remove some blemishes using Photoshop. I thought that I needed some painting skills if I wanted to restore the cracked part (which I didn’t).
Fast forward to 2021, my mind was blown to discover that technology could make animated portraits. Literally, it could make old stagnant photos come alive. If you want to see it for yourself, upload some pictures at MyHeritage Deep Nostalgia.
Here are they in their wedding day. Nanay, as we call our grandmother, survived her husband, Tatay. She’s now in her mid-80s, still as witty and beautiful as ever.
While I was at it, I also ran their portrait in MyHeritage In Color to somewhat colorize and enhance it. Amazing!

A colorized and enhanced version of the wedding portrait of my paternal grandparents. Update: 3 April 2021
When Nanay saw the moving portrait
Sabagay nung teenager ako, nanalo ako sa beauty contest. Kinukuha ako mag-artista ng tauhan ng Sampaguita Pictures, ayaw ng stepmother ko, baka raw mapariwara lang ang buhay ko. Sa Castillejos, Zambales yun, year 1949.
Nanay CarolinaI said that if ever she took the offer, she would be alongside Susan Roces in Ang Probinsyano. She corrected me by saying that her colleagues would be Tita Duran, Pancho Magalona, Rogelio de la Rosa, and, Carmen Rosales. And that we won’t be born into the world. But she reassured me that all of us, my brothers and I, would be actors as well.
-
Reading List: Week 1, March 2021
- What’s the actual risk of telling a little white lie on your résumé?
- How MyHeritage Brought Family Pictures to Life Using D-ID’S Live Portrait
- The Velocity of Skill Development: Quickly Closing the Gap
- Ness Labs
- When Everyone’s a Genius (A Few Thoughts on Speculation)
- Non-fungible token
- Why did I leave Google or, why did I stay so long?
-
Avaloq Philam Life
The first time I’ve been at Avaloq’s office at Philam Life building was during my second interview. I was impressed by the interior design of the pantry. There by the couch were some company brochures in the style of a newspaper. I took one home to familiarize myself with the new company that I was planning to join.
Fast forward to almost a year, I was back to this office to get a Macbook device which was an official issue for UX designers.

A top view of Apple devices. While waiting, I hang out by the pantry and had some coffee. There were wine bottles and glasses on the wall but only as decor (they were empty, I checked).

Brian Dys drinking coffee at the office pantry. Outside, during lunch, it was a typical workday — only that everyone’s wearing face shields and masks. There were many people lining up at Dunkin’ at Paseo Center. I went to Yellow Cab for a grub.

Ayala Ave. with light traffic and the statue of Ninoy Aquino. I was oblivious to the fact that some companies have their employees back on site until I went to the office myself. This was also evident on the road, by the number of vehicles going somewhere. Life goes on, indeed, with the pandemic still as dangerous as it started — we just managed to become familiar of how to stay safe in the outside world. I hope complacency in being careful does not get the best of anyone.

An MMDA enforcer and a motorcycle rider at EDSA near Reliance St. It was a Friday — a celebratory day wherein just last year when my officemates / friends would go out for dinner and some drinks, and sometimes the office turned on its party mode. Now, I had to rush home to avoid the heavy traffic in EDSA.
What permanently changed, we’ll only know as we’re putting old normal things one by one into the new normal.
[ntt_percept page=”avaloq-open-positions”] -
RE:Creation No. 3: Dorset Cereals | Front panel | Text
Previously, we have tackled an introduction to recreating Dorset Cereals. Now, we’ll begin with doing the initial work that will be the basis of the HTML and CSS.
Summary

A diagram showing the RE:Creation steps in Text stage. - Convert content into text
- Group and label texts
- Structure groups via header, main, footer

The front panel of Dorset Cereals with element labels. The first step of RE:Creation is to convert the content (in this case, the visual elements) into text. As you can see in the figure above, we have itemized the elements of the front panel and we have also grouped related elements together. This kind of visualization makes it easier for us to accomplish this stage.
Step 1: Convert content into text
- Let’s go from left to right, top to bottom in converting content into text
- For symbols, if they have a corresponding Unicode character, let’s use them (e.g., use ℮ for estimated sign, ® registered sign)
- For illustrations, we could describe the type of style they have
See the Pen RE:Creation No. 3: Dorset Cereals | Front panel | Text – Convert content into text by Brian Dys Sahagun (@briandys) on CodePen.
Step 2: Group and label the texts
- There are elements that need to be grouped together and there are elements that are standalone
- “Pioneer Centre” and “326.00” can be grouped into “Store tag”
- “Dorset Cereals®” is standalone and can be labeled as “Product name”
- Label everything, both elements and groups
- Identify and label “main” elements based on the contents’ visual hierarchy (e.g., “Product main description” — “main” is depicted based on the elements position and size in the visuals)
- Labels can describe the content’s literal meaning (e.g., “Product content percentage description” instead of simply, “Product description”)
See the Pen RE:Creation No. 3: Dorset Cereals | Front panel | Text – Group and label texts by Brian Dys Sahagun (@briandys) on CodePen.
Step 3: Structure groups via header, main, footer
- “Header” group contains identifying information that help the consumer immediately identify the product
- “Main” group contains the details that help the consumer decide to buy or not buy the product
- “Footer” group contains other information that supplements the details when the consumer wants to learn more
- Distribute the labeled groups into the header-main-footer structure
- Arrange the groups according to the importance of its containing information (e.g., “Main illustration” is placed last because other information are more important in terms of helping the consumer decide)
- At this point, there is no information that fits in the “Footer” group
See the Pen RE:Creation No. 3: Dorset Cereals | Front panel | Text – Structure groups via header, main, footer by Brian Dys Sahagun (@briandys) on CodePen.
You might have noticed that we’ve replicated the capitalization of text to simplify the process. For example, the store name could be styled as “Pioneer Centre” but we opted to replicate it as “PIONEER CENTRE”. Capitalization has a nuance in the brand’s style of writing. In any case, CSS can handle modifying the capitalization, and we’ll get to that later in the process.
That’s it for Text stage!
Now, we already have a basis for coding in HTML and CSS. Go to the next stage, which is HTML (markup).
-
Reading List: Week 4, February 2021
- Get Hired: Building a Solid UX Design Portfolio
- Our industry needs more designers. Most importantly: a different type of designer.
- Teacher to UX designer: A roadmap
- Front-of-the-front-end and back-of-the-front-end web development
- How to Handle Dominating Participants in UX Workshops: 3 Tactics
- Things I wish UX candidates would ask me during interviews
- Greeking Versus Designing with Actual Content
- Citibank just got a $500 million lesson in the importance of UI design
-
RE:Creation No. 3: Dorset Cereals
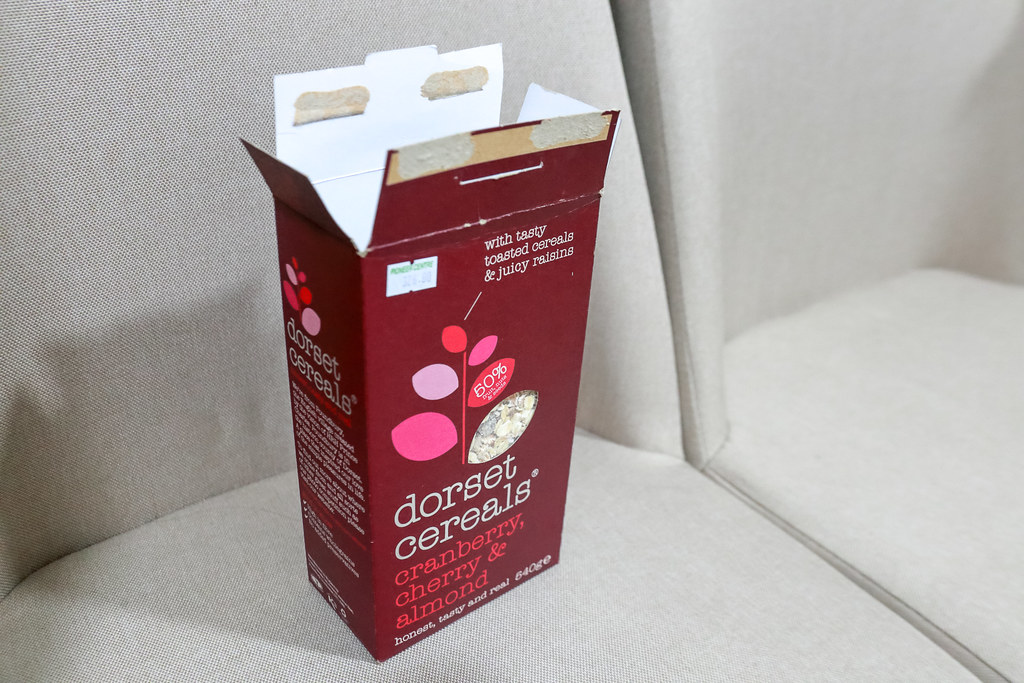
An open Dorset Cereals box in a chair. In this episode of RE:Creation, we’ll be recreating a cereal box in HTML and CSS. One thing I like about consumer product packaging is that almost everything is written there in that little space. It’s like a website in the palm of your hands at a grocery aisle (or at your breakfast table).
First, let’s lay down all the steps that we will take in order to make this happen.

A diagram showing the steps of RE:Creation. - Planning
- What is the goal?
- How to approach this thing?
- What are the elements involved?
- Doing
- Converting to Text
- Converting to HTML
- Converting to CSS
- Wrapping up
- Did we achieve the goal?
- What did we learn?
Planning
In order for us to have a clear scope of this exercise, we need to see the all the elements of the packaging through an expanded view.

Dorset Cereals packaging in an expanded view. Goal
The main goal is for us to recreate it using HTML and CSS and learn various concepts of design and coding along the way.
Approach
First, look at the information and identify which are important compared to others — that will be the arrangement of contents in HTML. For example, the front of the packaging comes first before the sides and back.
Next, look at how the panels are laid out — that will be the visual arrangement in CSS. For example, the back of the packaging is at the leftmost — which means, it comes first before the sides and front (for left to right direction).
Elements
We’re breaking down the packaging to its individual elements by panel and flap. We have 4 panels and 9 flaps, for a total of 13 segments — this is also how we are scoping each section of the recreation. For example, we will tackle the front panel first, then back panel, and so on.

Dorset Cereals packaging with segment labels. - Planning
-
Strapped for straps

A photo of Swatch watch and a wallet in a drawer. Photo by Brian Dys It was more than 10 years ago since I bought a Swatch watch called Something New. It was tiny classic black and white watch that had a plastic strap that cost one-third of the watch’s original price (and it breaks every year, the strap). This is what really deterred me from buying from Swatch. Metal and leather straps were me when I was 14 years old but not anymore. Durability and style require delicate balance.

A screenshot of Something New from Swatch’s website. 19 Feb 2021 After that, I switched to Casio, with another classic — an F-91W which is a cheap ₱999 watch whose strap also breaks — but this time, every six months. Again, the strap cost a third of the original price. After around 3 strap replacements, it is now again in a brink of breaking. Planned obsolescence for “bottom-of-the-line” products — these watch makers have perfected a ploy.

A flipped Casio F-91W with a broken strap. 
A screenshot of F-91W from Casio’s website. 19 Feb 2021 Just a couple of days ago, I couldn’t leave the mall without taking home this greenish-looking watch called We in the Khaki Now. With it, I partnered another watch for Jaycelle as a surprise — Sunblush (Swatch has a really fun way of naming their watches).

A screenshot of We in the Khaki Now from Swatch’s website. 19 Feb 2021 
A screenshot of Sunblush from Swatch’s website. 19 Feb 2021 Of course, after eyeing these two awesome watches, my first question for the salesperson was, “What kind of straps do they have?” I was glad not to hear “plastic” or “rubber” — but “silicone“. It’s time to give it another try.
When I got home, I searched for more information regarding the straps and found out that We in the Khaki Now has a “bio-sourced material” strap. I just hope that this time the straps would last for years.
-
Reading List: Week 3, February 2021
- The One, Simple Secret To A Successful Career
- Matt Mullenweg: Collaboration Is Key
- Nielsen Norman Group
- Early-career UXers: Your most impressive work is missing from your portfolio
- Best Story Wins
- How People Learn to Become Resilient
- 12 Life Lessons From Mathematician and Philosopher Gian-Carlo Rota
One of the things he taught me early on was make reversible decisions quickly and irreversible ones deliberately, and I still return to that on a weekly basis. If it’s a reversible decision we’ll probably learn a lot more by doing it.
Matt Mullenweg[ntt_percept page=”email-newsletter”]